WEDA Console Walkthrough
This guide walks through the WEDA Console (MUI) end to end, grouped into three areas: Device Management, Container Management, and Data & Monitoring.
Device Management
Create an Organization
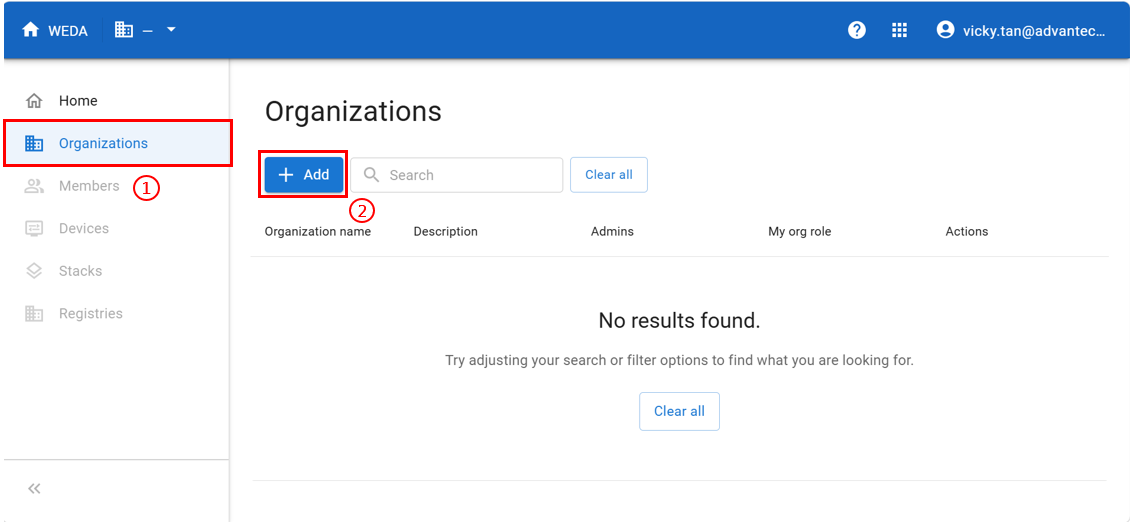
- Click Organizations in the left sidebar.
- Click the Add button to create a new organization.
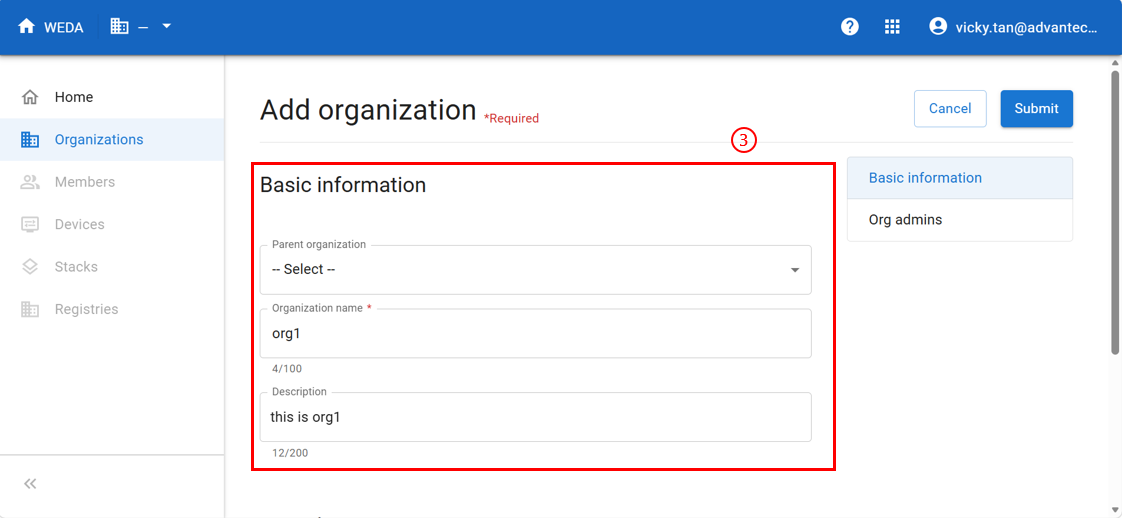
- Fill in the Basic information: optionally select a Parent organization, then enter the Organization name and Description.
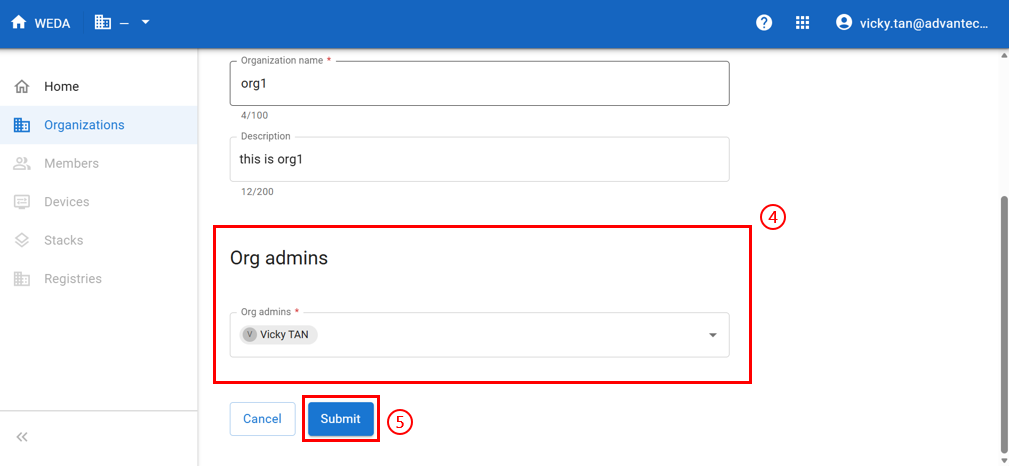
- Switch to the Org admins tab and assign at least one admin for the organization.
- Click Submit. A confirmation dialog appears.
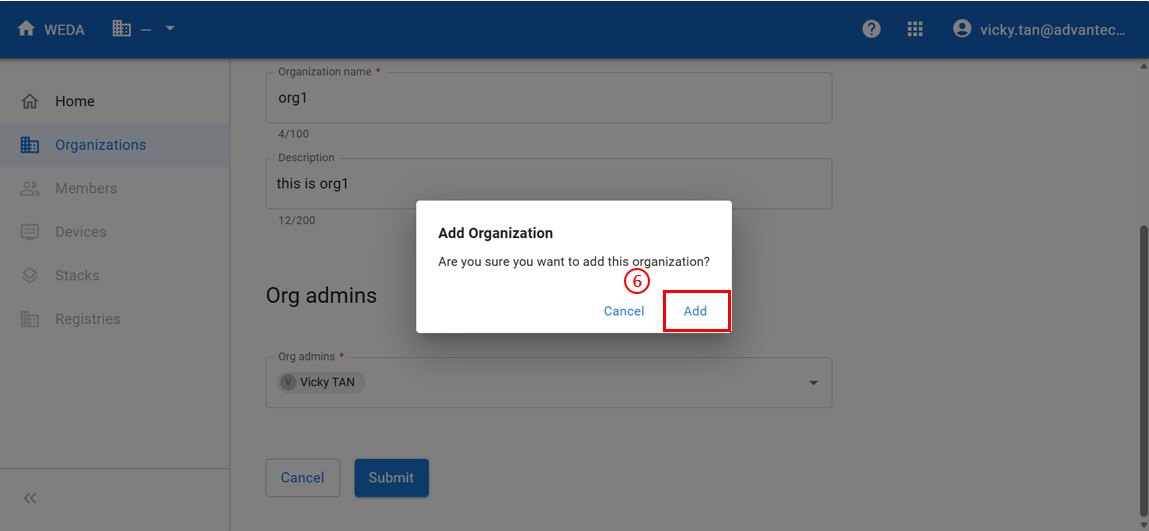
- Click Add to confirm.
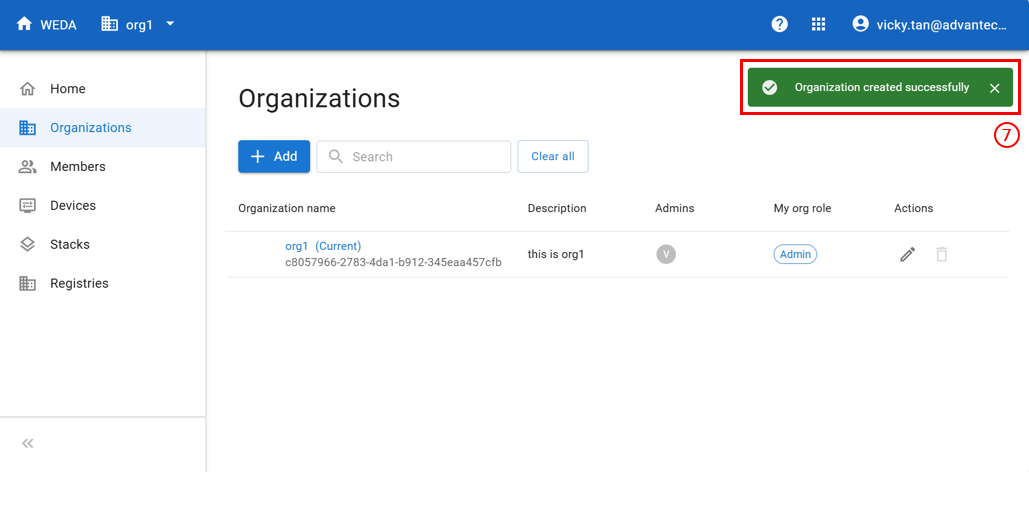
- The organization is created successfully. A success banner is shown, the new organization appears in the list, and it becomes the active organization (shown in the top-left switcher).
Add a Device to the Organization
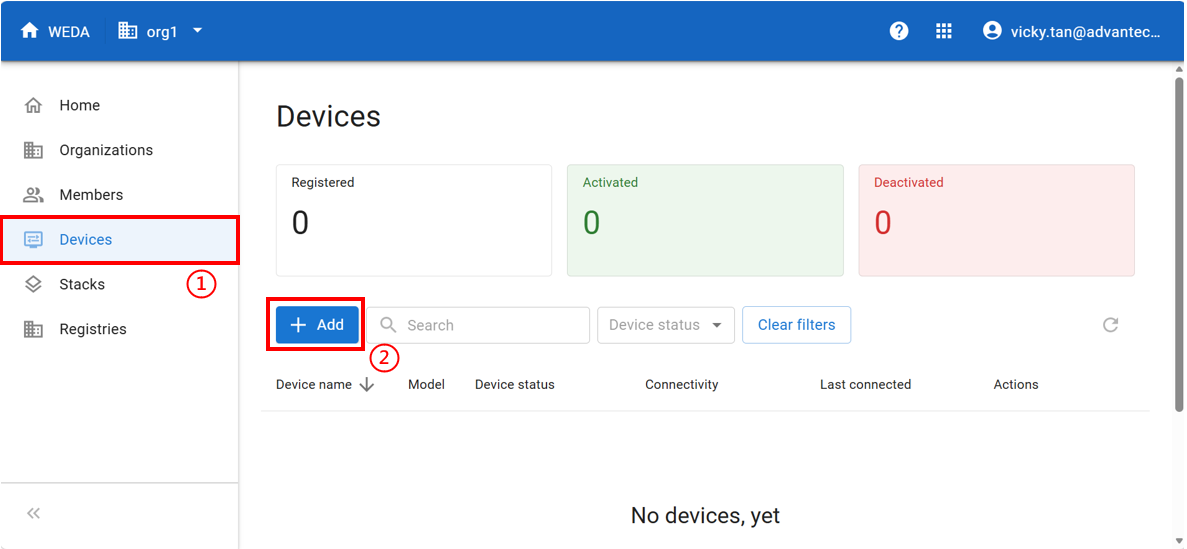
- Click Devices in the left sidebar.
- Click the Add button.
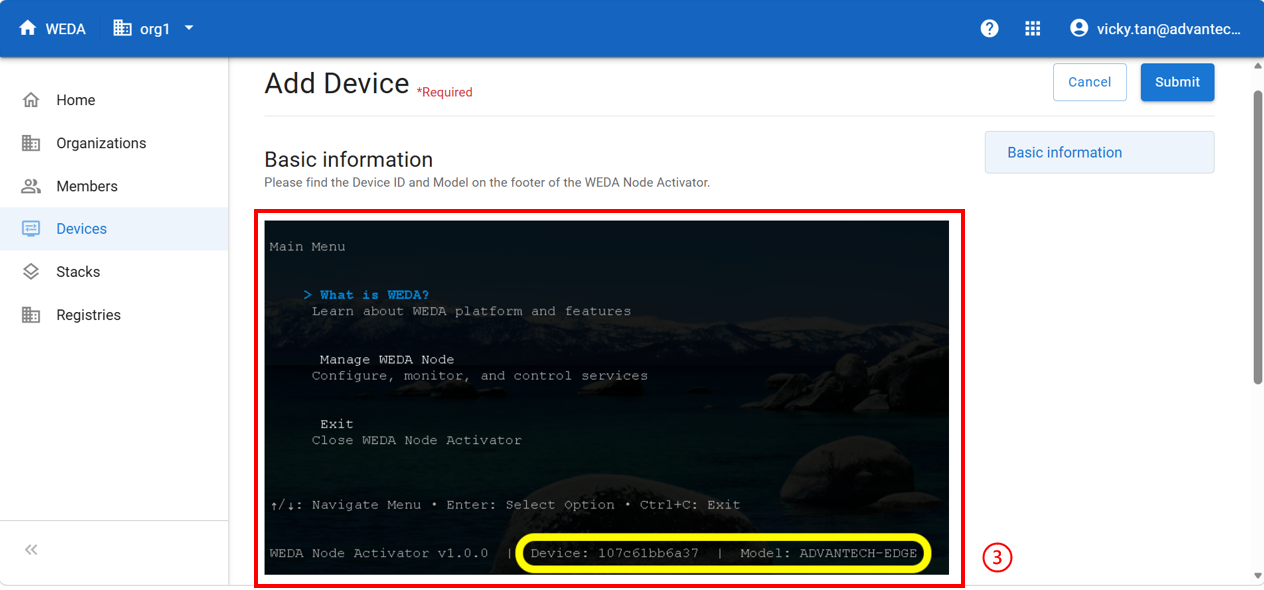
- Find the Device ID and Model on the footer of the WEDA Node Activator.
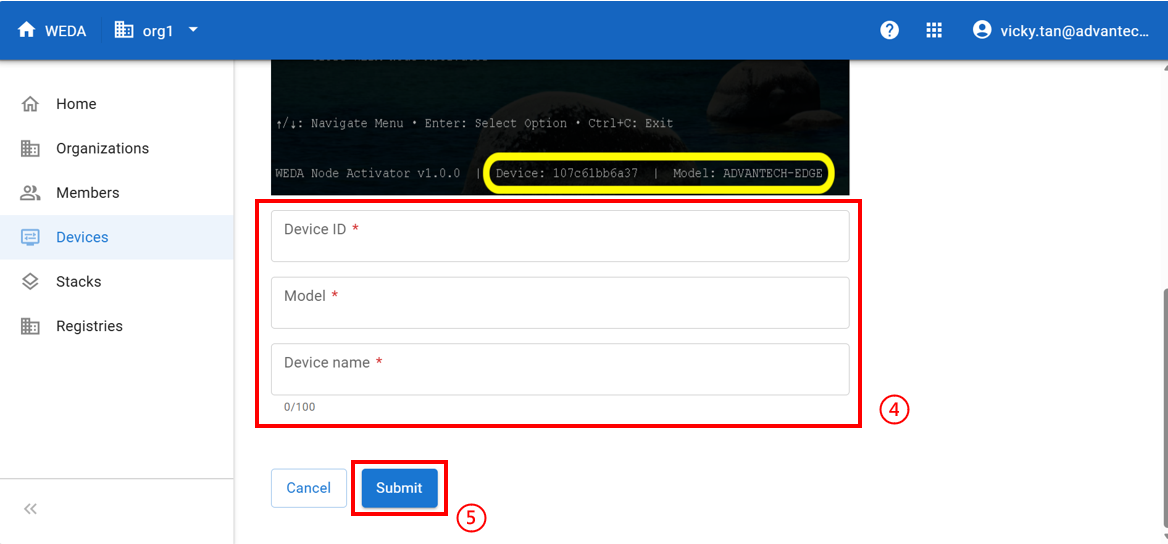
- Enter the Device ID, Model, and Device name.
- Click Submit. A confirmation dialog appears.
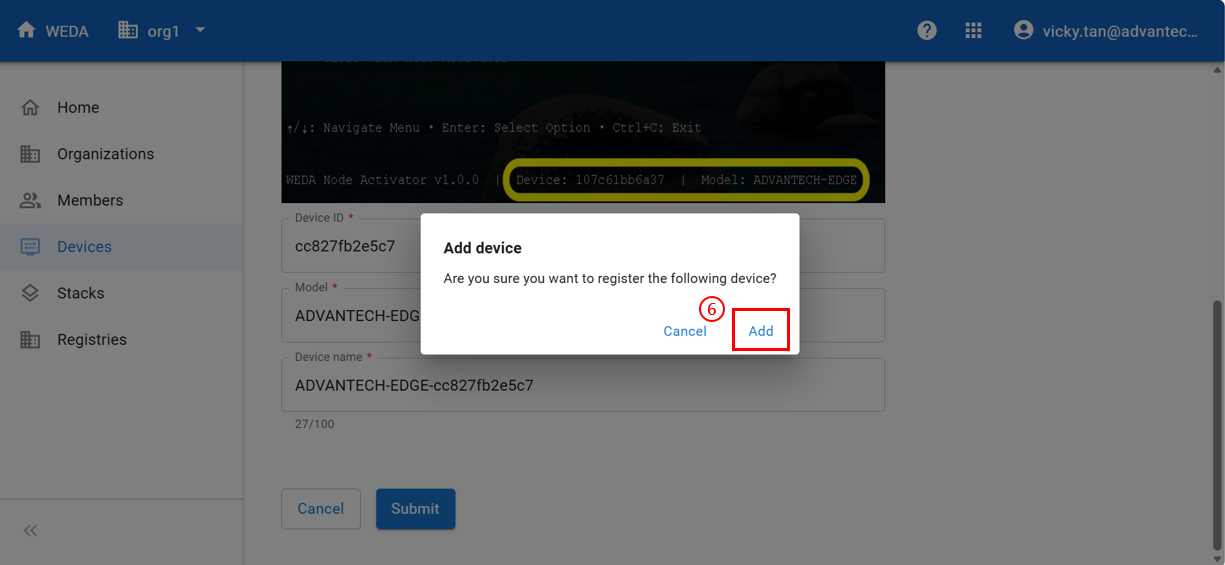
- Click Add to confirm.
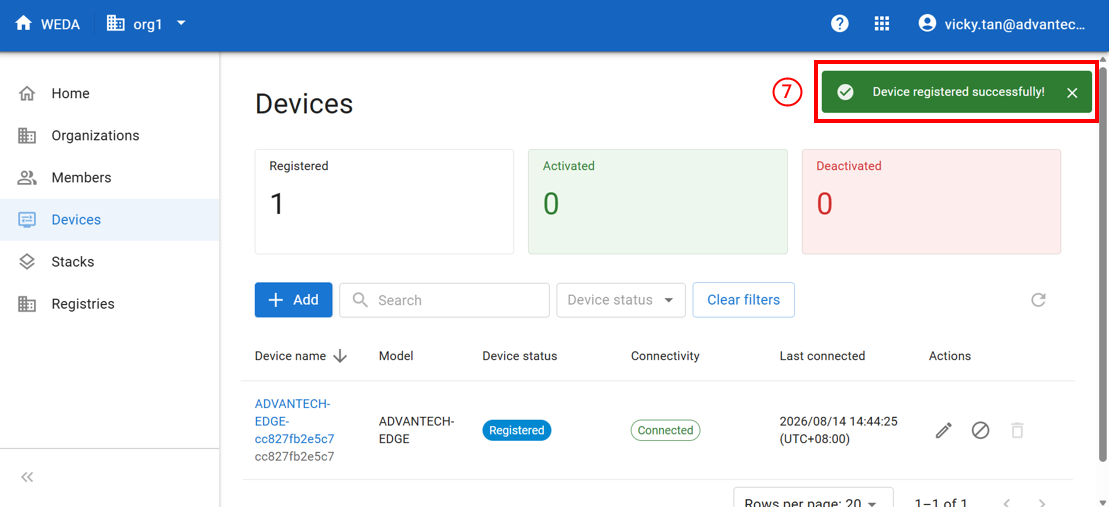
- Back on the Devices page, a success banner is shown and the device is listed with Registered status.
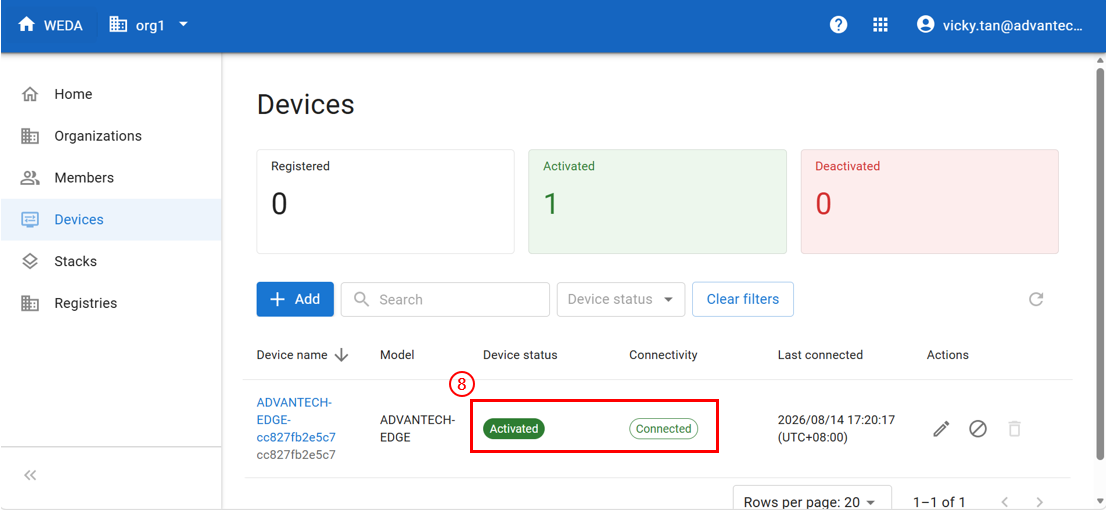
- Once WEDA Node connects on the physical device, the device status updates to Activated and Connected.
Container Management
Get the Container YAML from ACC
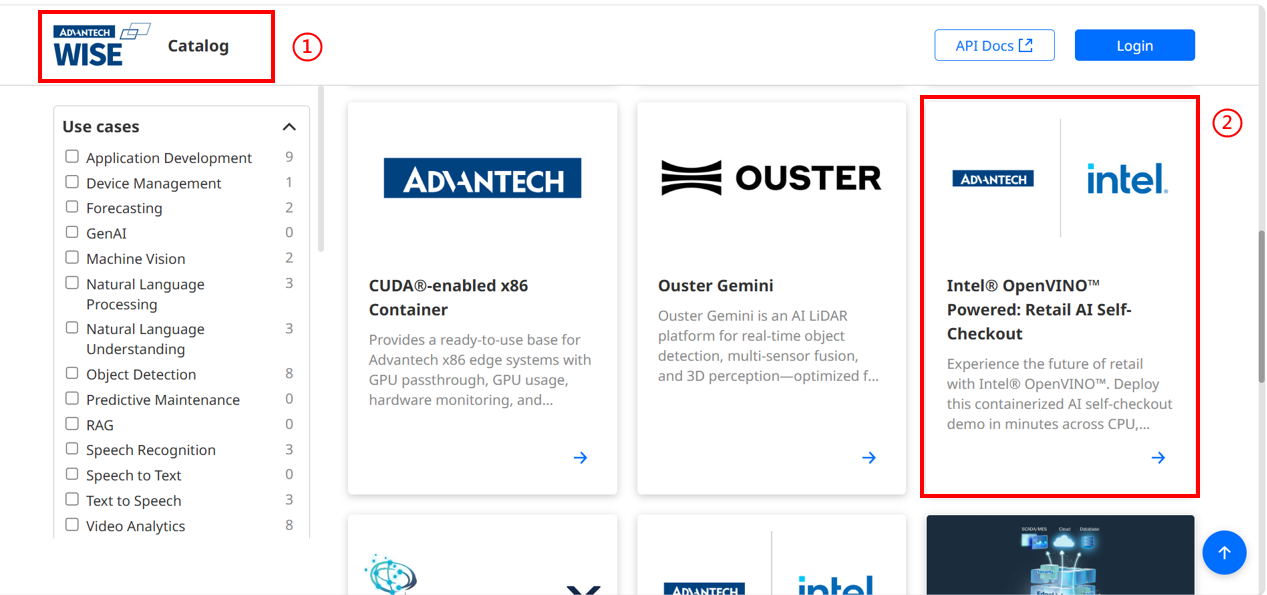
- Go to the Advantech Container Catalog (ACC).
- Choose a container.
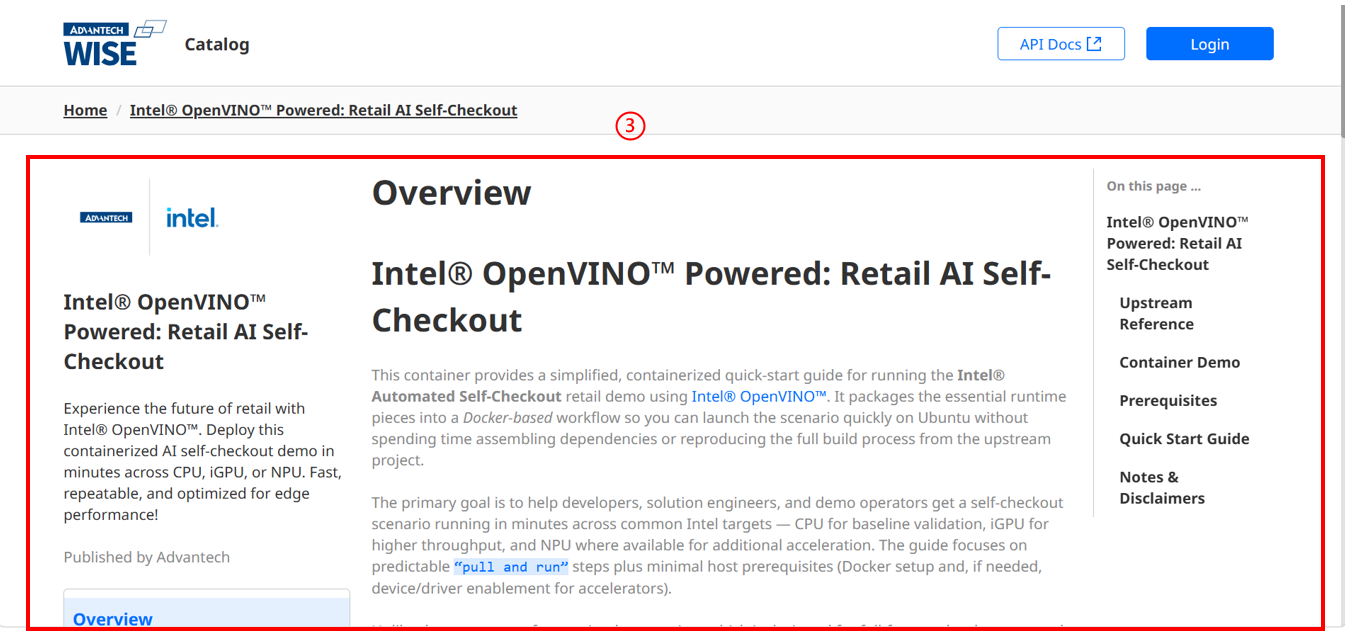
- Open the container's detail page.
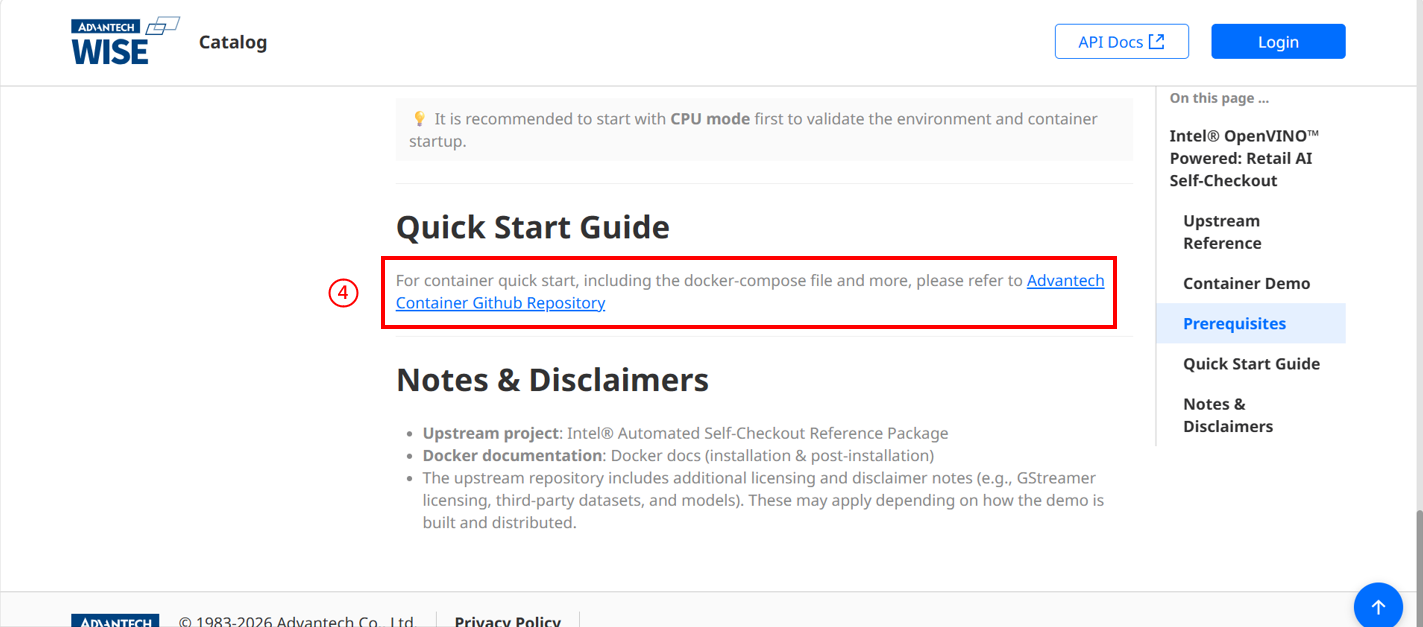
- Click the Advantech Container Github Repository link in the Quick Start Guide section.
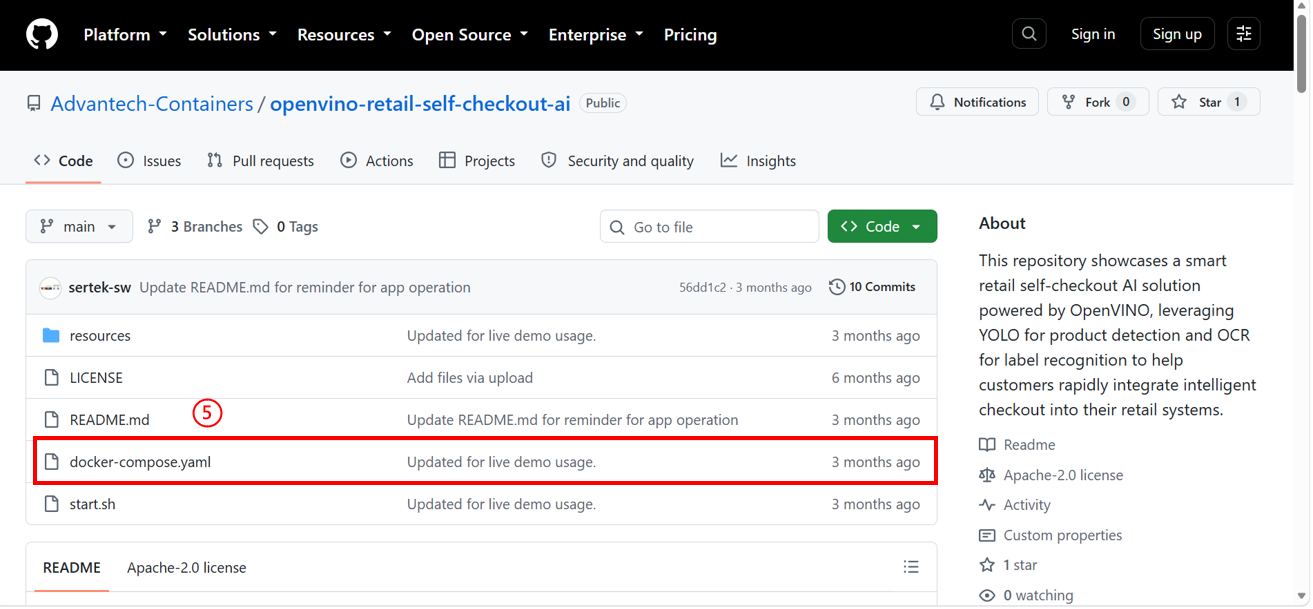
- Download the
docker-compose.yamlfile for later use.
Add a Registry
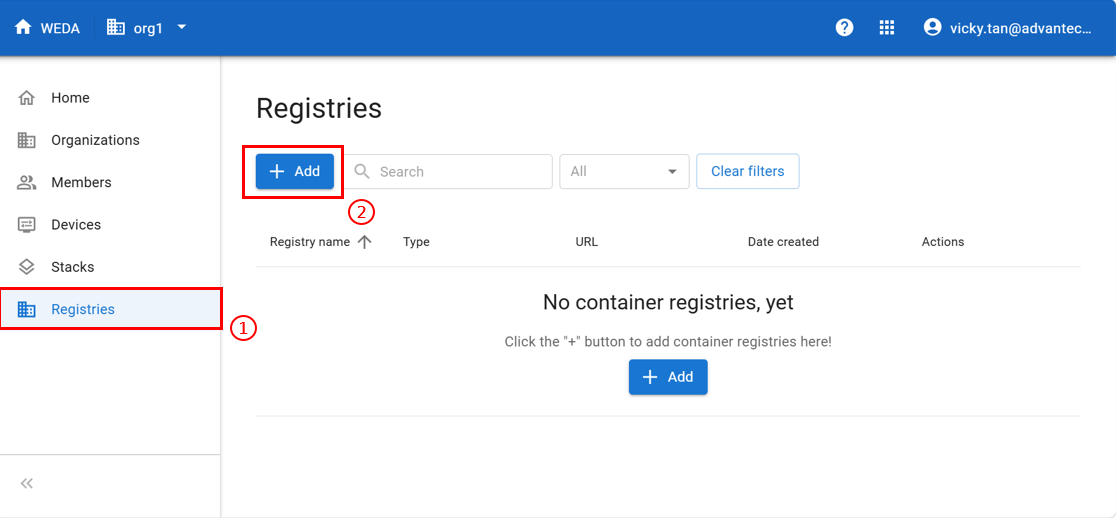
- Click Registries in the left sidebar.
- Click the Add button.
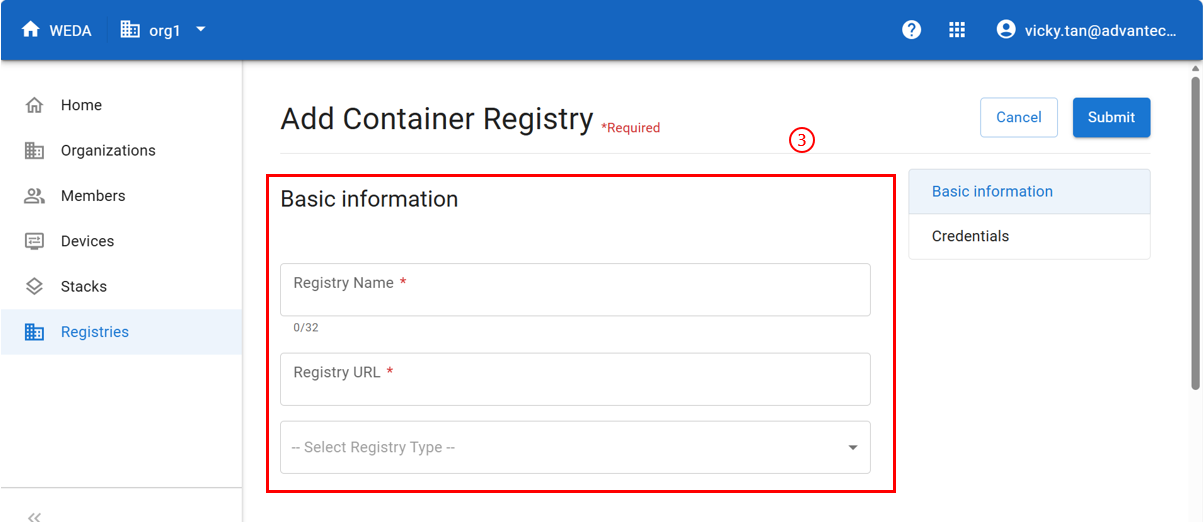
- Fill in the Basic information: Registry Name, Registry URL, and Registry Type.
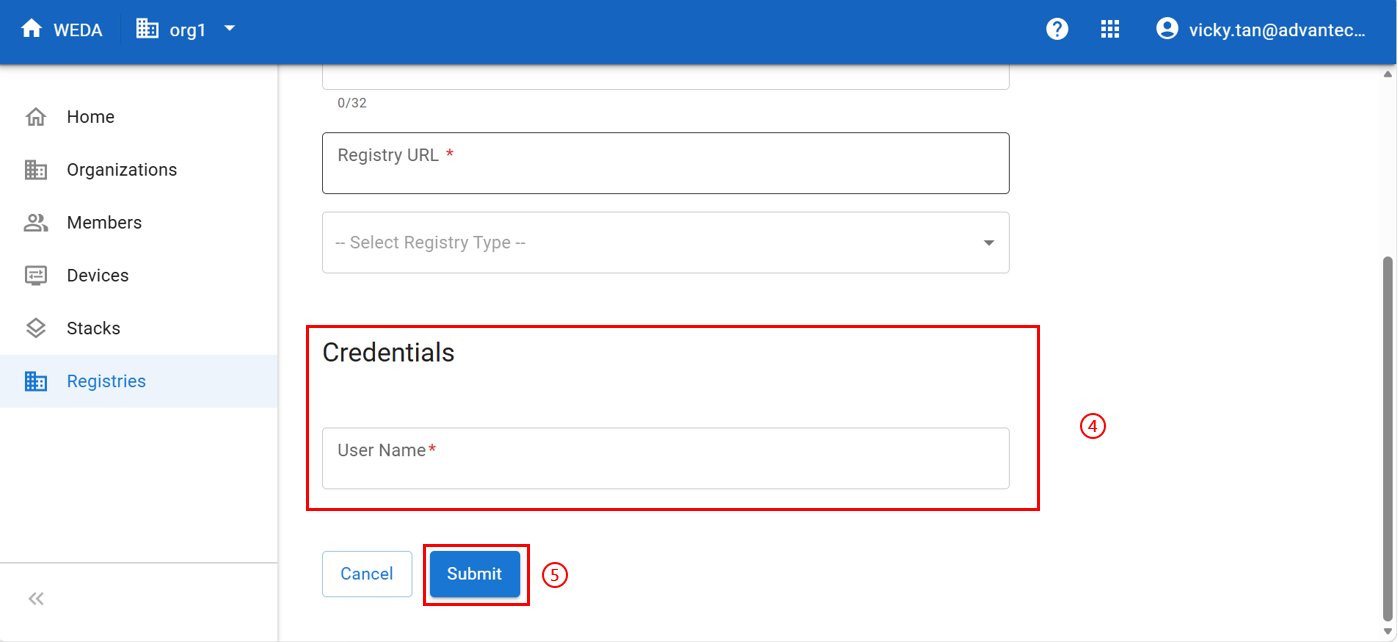
- Fill in the Credentials.
- Click Submit. A confirmation dialog appears.
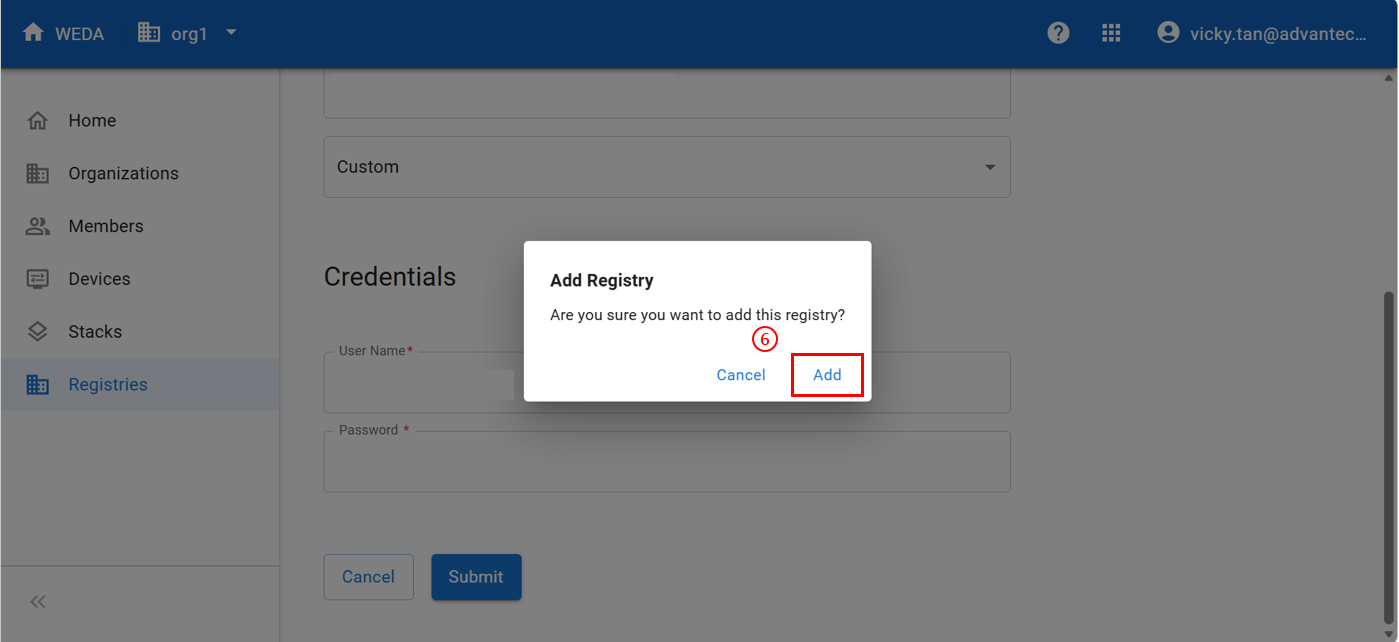
- Click Add to confirm.
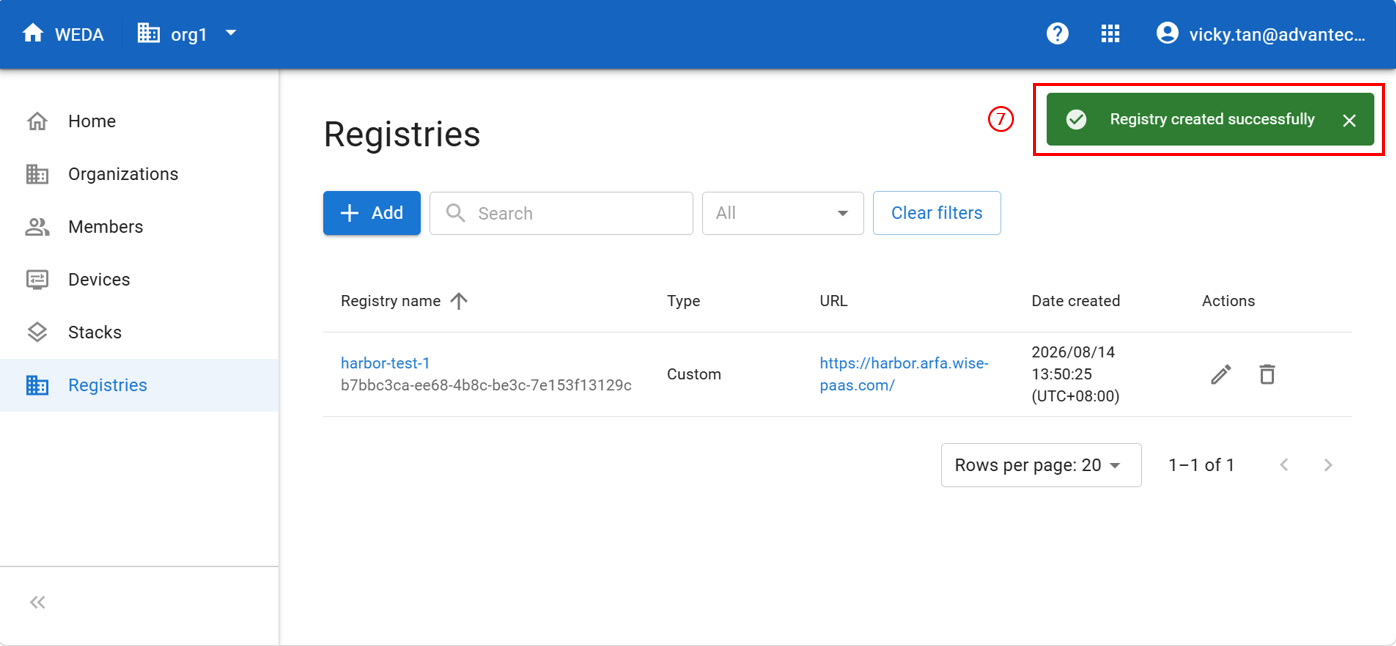
- Back on the Registries page, a success banner is shown and the new registry appears in the list.
Create a Container Stack
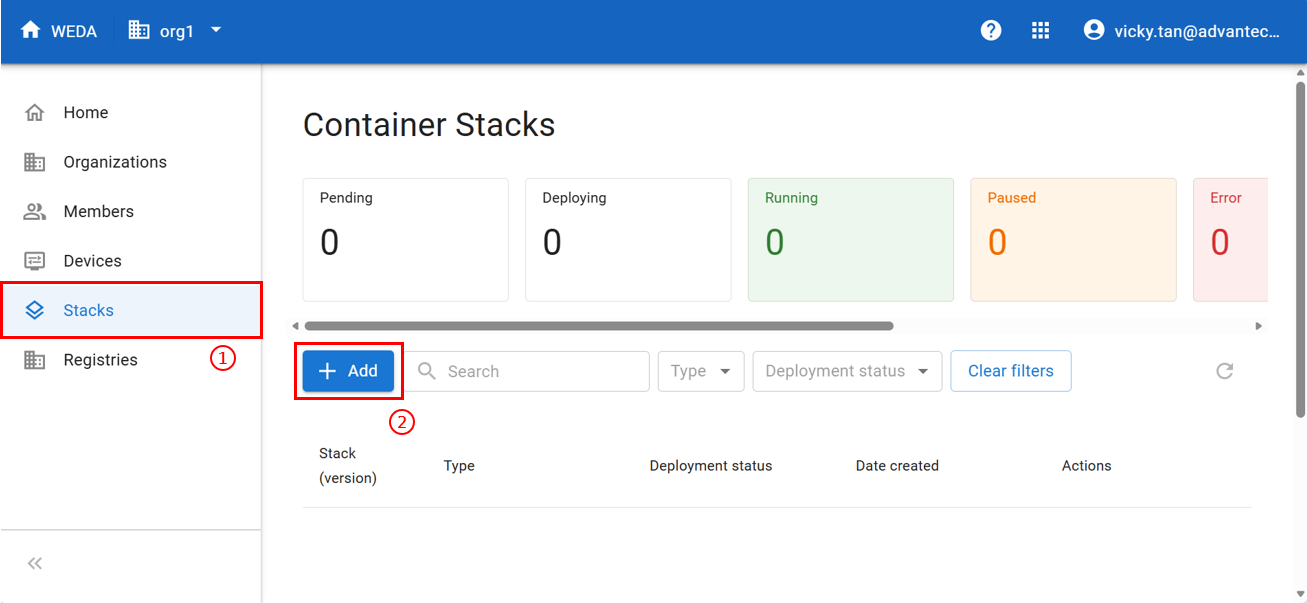
- Click Stacks in the left sidebar.
- Click the Add button.
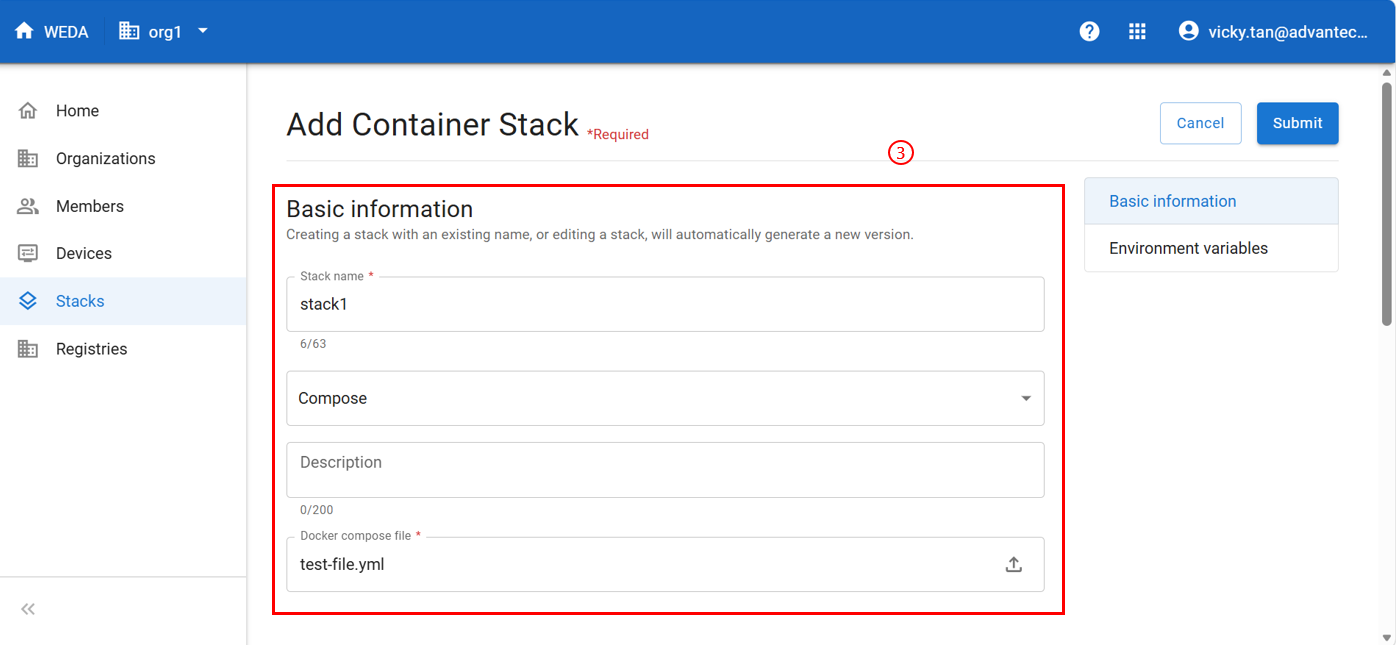
- Fill in the Basic information: Stack name, type (e.g. Compose), optional Description, and upload the Docker compose file (the
docker-compose.yamldownloaded from ACC).
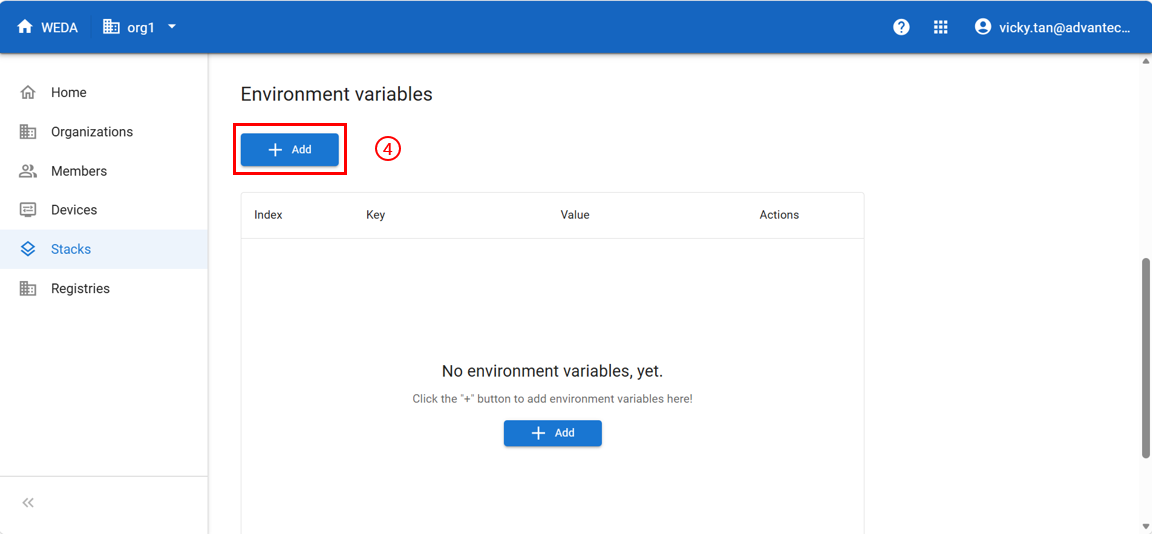
- Optionally add Environment variables.
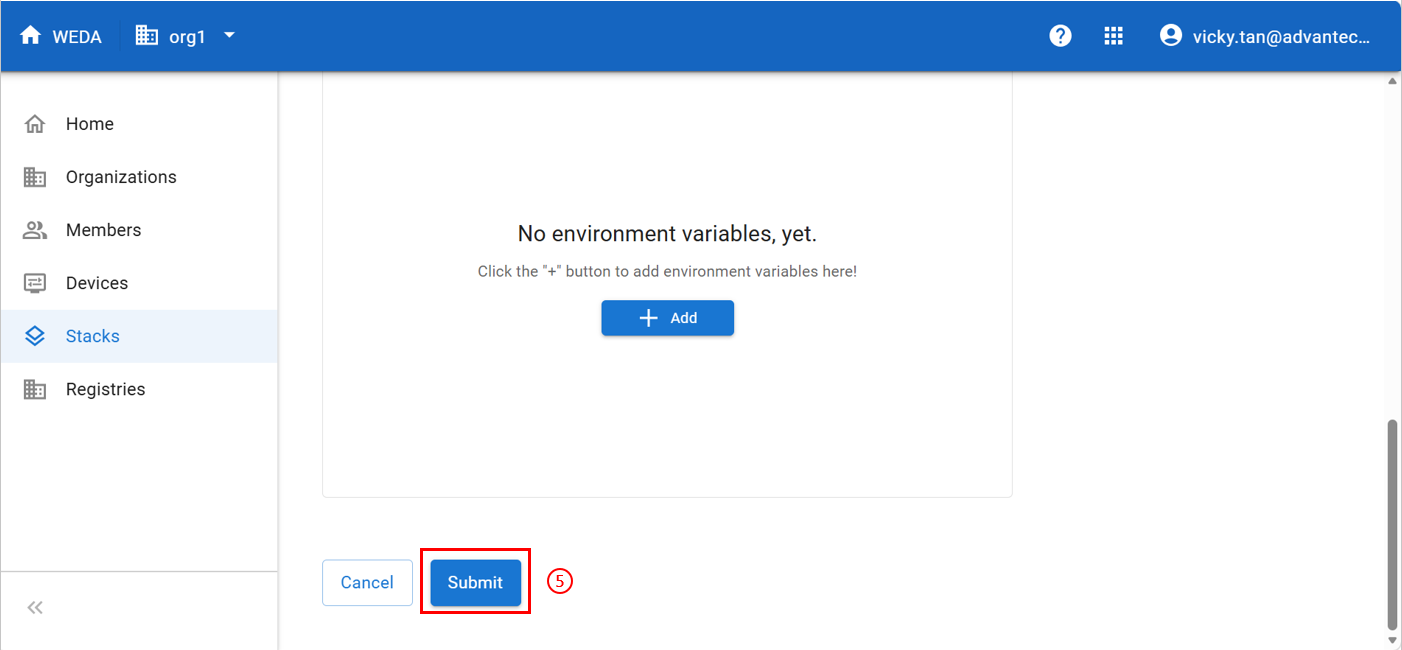
- Click Submit. A confirmation dialog appears.
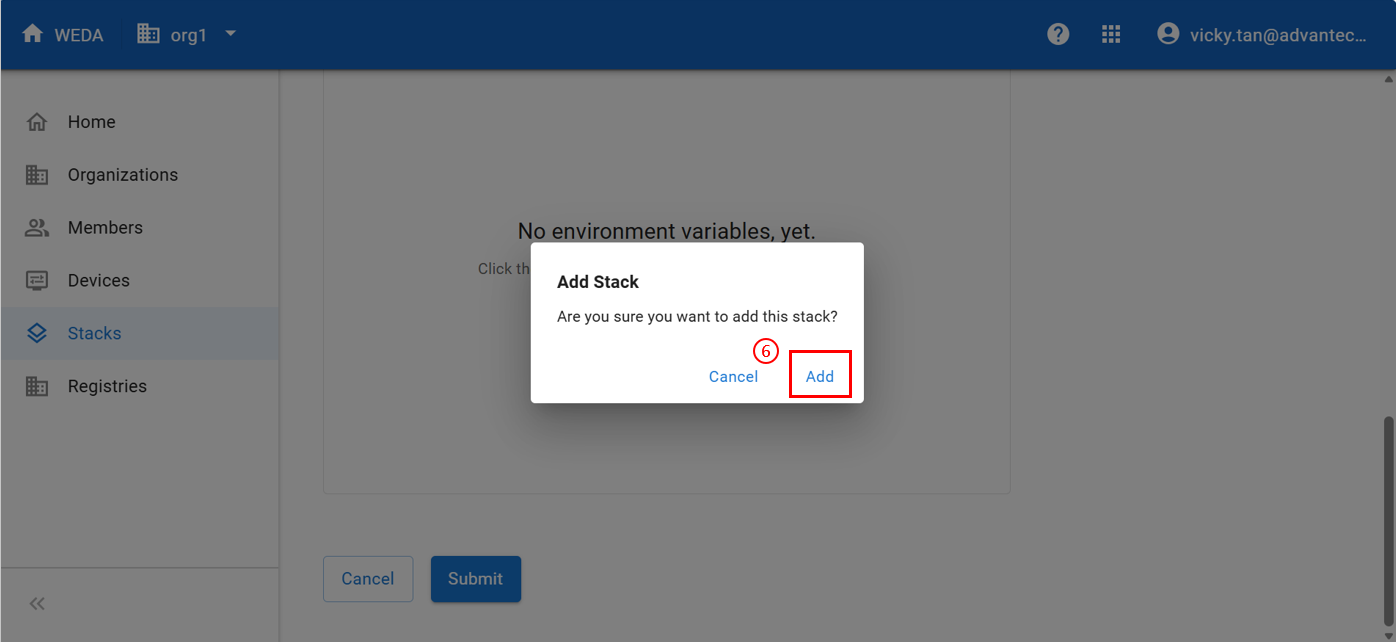
- Click Add to confirm.
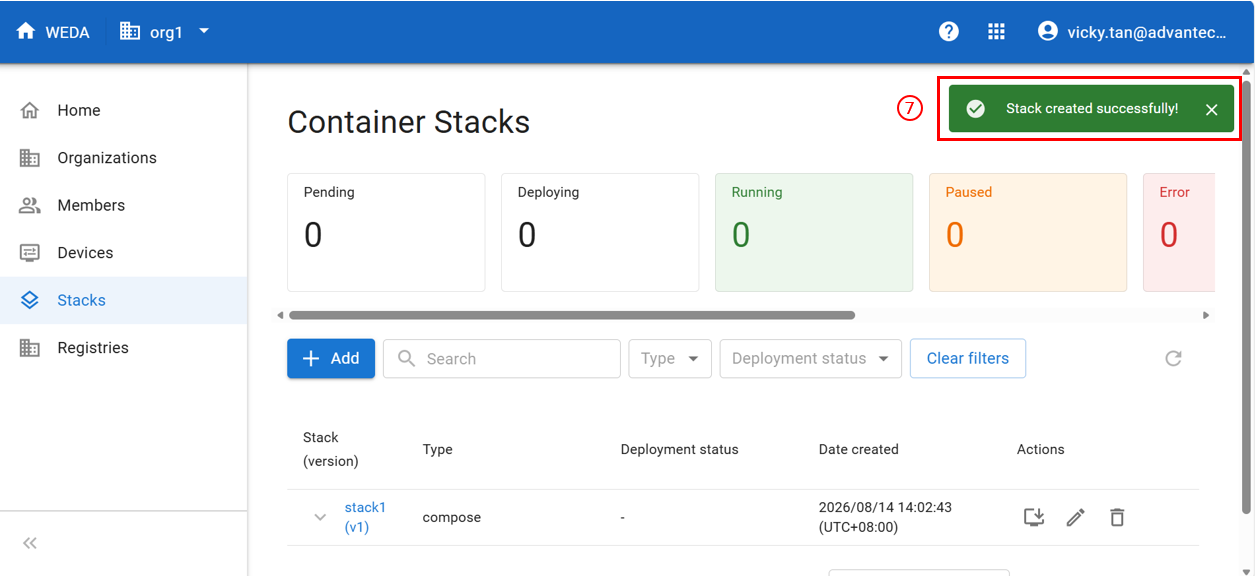
- Back on the Container Stacks page, a success banner is shown and the new stack appears in the list.
Deploy the Stack to a Device
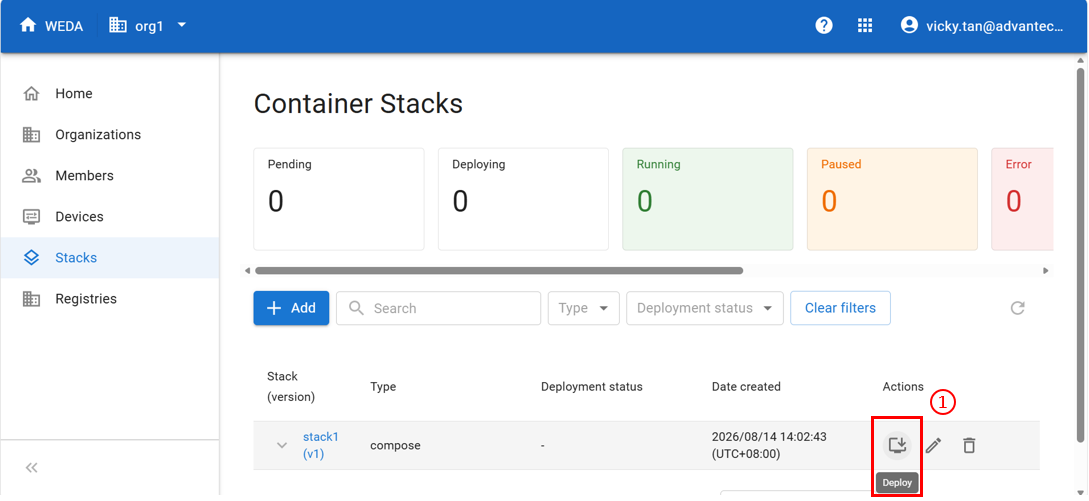
- On the Container Stacks page, click the Deploy icon for the stack.
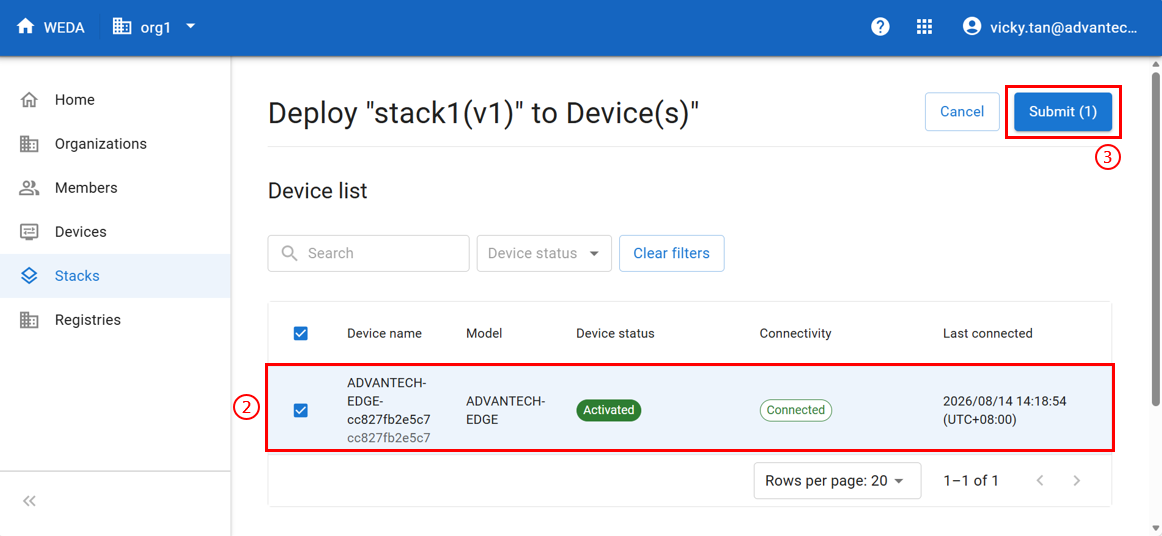
- Check the box next to the device(s) to deploy to.
- Click Submit.
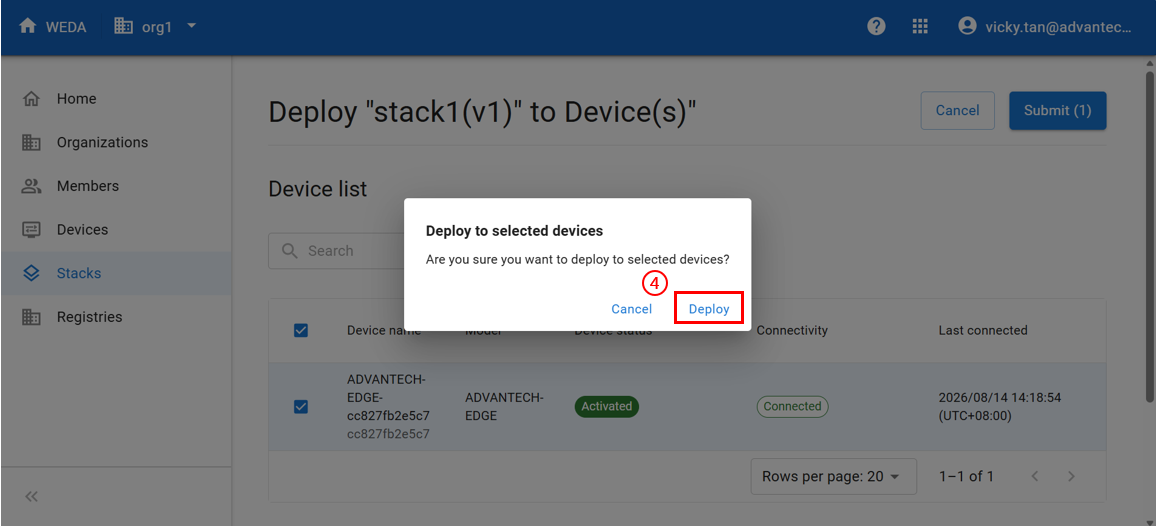
- Click Deploy to confirm.
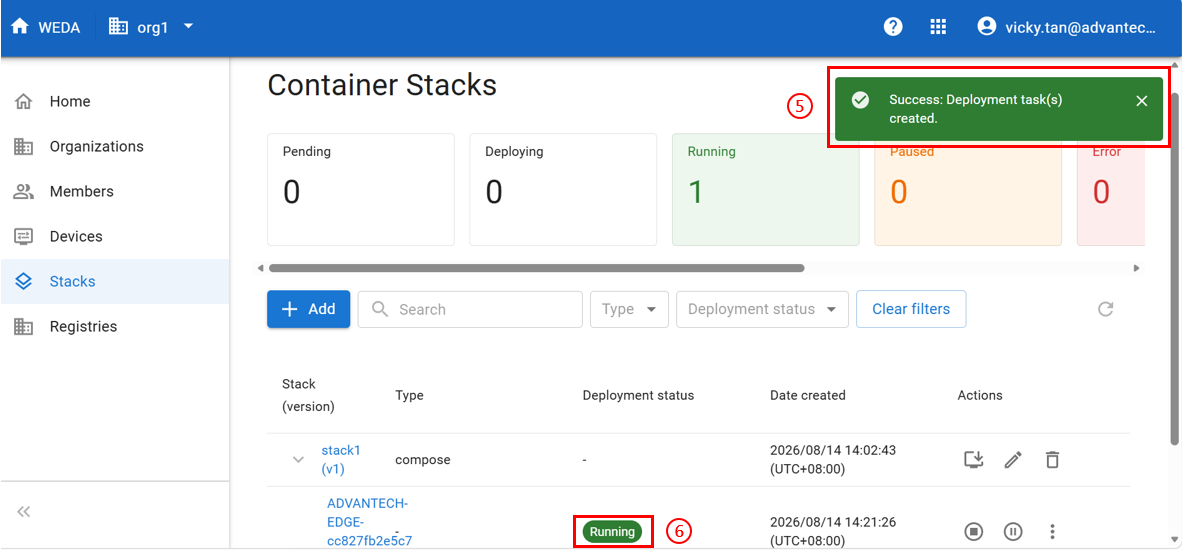
- Back on the Container Stacks page, a success banner is shown.
- Wait for the deployment status to reach Running.
Data & Monitoring
備註
Currently only the latest telemetry value can be viewed in the Console. More monitoring features will be added as they become available.
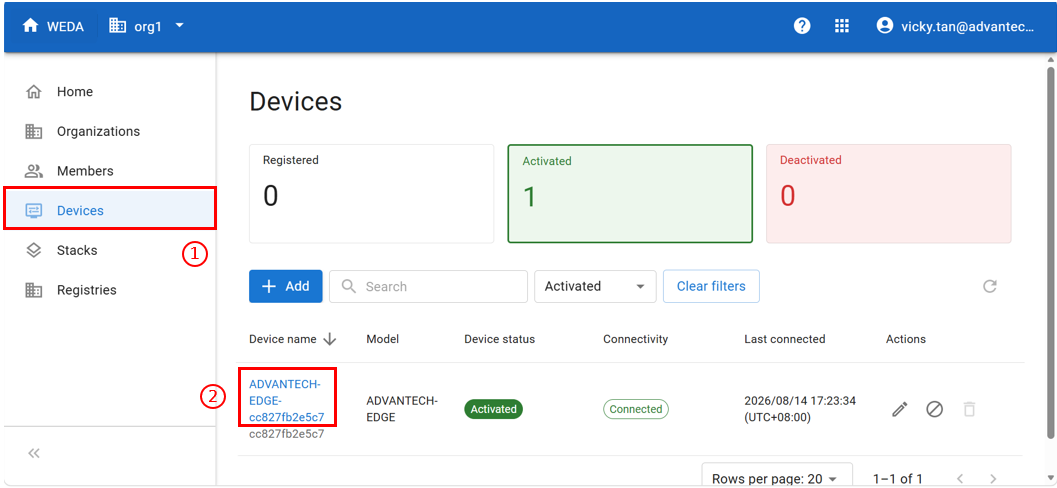
- Click Devices in the left sidebar.
- Click a device in the list.
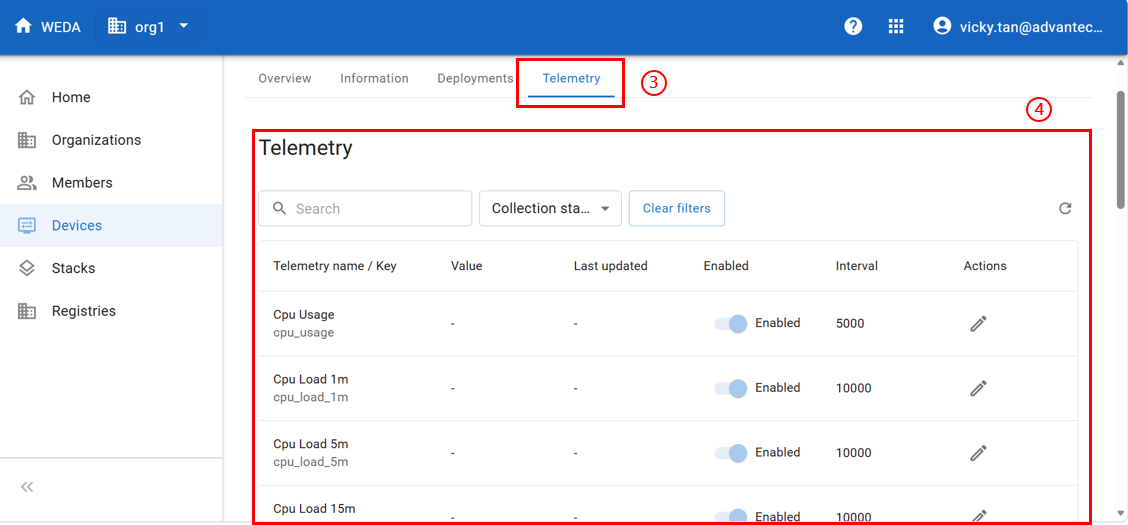
- Click the Telemetry tab.
- View the latest value of each telemetry item.
Last updated on Aug-27, 2026 | Version 1.1.2